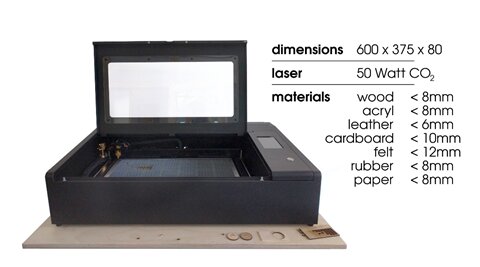
Our materials are smaller than the dimensions of the cutter. Check the dimensions and take them into account in your design.
How to laser cut
1. Book
Book the device via Book a Thing.
2. Create (or download) a cuttable 2D design
To create a cuttable 2D design, use a vector graphics editor such as Inkscape. This free software is also available on the computers in the library.
Flux Beambox Pro works best with plain .svg files made in Inkscape. Other programs can cause double lines or other shortcomings that may require you to readjust your design.
In the vector graphics editor you can assign different colours (or layers) to the parts you want to cut or engrave. It is customary to use:
- Red lines of 0.1 mm for cutting
- Blue lines of 0.1 mm for engraving
- Black areas for engraving a surface
You can download designs at Thingiverse or Instructables.
Pixel drawings (.jpg and .png) can only be engraved.
4. Pick your material
Pick the material you want to cut or engrave. Put the material inside the laser cutter on the right height.
Our materials are smaller than the dimensions of the cutter. Check the dimensions and take them into account in your design.
5. Convert your design using Beam Studio
Prepare the 2D design for cutting using Beam Studio. Beam Studio is available at the desktop PC in BibLab. Adjust the speed and power of the laser according to the material used.
6. Have your design approved by the library staff
The library staff will
review your design. Together you will assess cost, material and feasibility.
7. Cut! (& stay present)
You can start cutting your
design at the BibLab PC or at the laser cutter using a memory stick.
Don’t leave the laser cutter unattended while cutting.
8. Pay
Materials are charged per piece. You can pay by Bancontact or Payconiq at the library counter.